Mastering DOM in JavaScript
Mastering Dom manipulation in JavaScript.

Software Engineer, Technical Writer. Love building software scalable systems with my stacks React, Javascript, Typescript.
The Document Object Model is a crucial aspect of web development, providing a representation and structure of HTML and XML documents. Javascript, often regarded as the oracle of web development, serves as a toolkit for DOM manipulation, enabling the creation of interactive and dynamic web pages.
In this article, we'll explore mastering DOM in JavaScript and explore various methods for manipulating the DOM.
What is Dom?
DOM which stands for Document Object Model is a programming interface that is used for creating, modifying, and removing elements from a website document. DOM in the realm of web development, is generally invoked in javascript to manipulate elements of HTML documents and XML documents. It represents the structure of a document as a tree of objects or nodes.
DOM hierarchy structure of nodes
The hierarchy structure for DOM represents a tree-like structure of how the nodes or objects are arranged in a default pattern. These default patterns are the normal HTML and XML documents. Here, we'll use HTML documents to represent our DOM.
<html>
    <head>
         <meta charset="UTF-8">
        <meta name="viewport" content="width=device-width, initial-scale=1.0">
        <meta http-equiv="X-UA-Compatible" content="ie=edge">
        <title>Dummy</title>
     </head>
        <body>
             <h1>Hello DummyOne</h1>
             <h2>Hello DummyTwo</h2>
        </body>


</html>
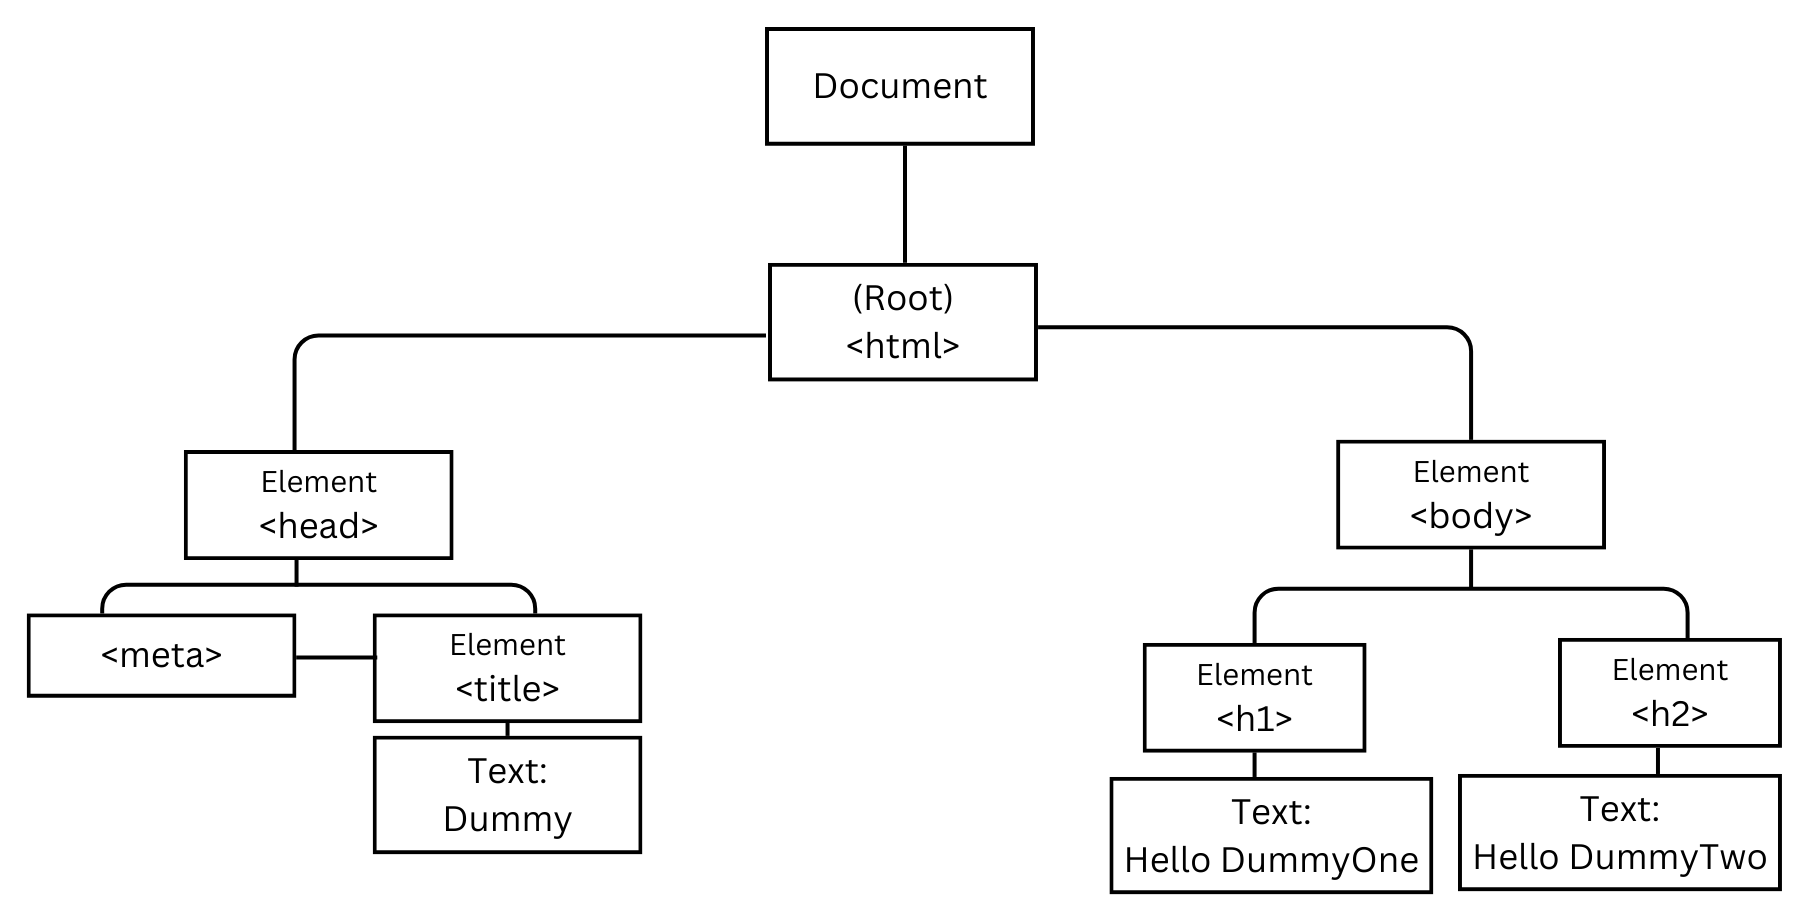
This diagram represents the hierarchy structure of the HTML documents.
Note: The DOM (Document Object Model) is not a programming language but rather a programming interface, without DOM, the javascript language would not have interactive and dynamic accessibility in terms of HTML Documents, image documents like SVG Documents, XML Documents and various other documents. In terms of programming with the DOM, Javascript a versatile programming language can be used to access and manipulate the DOM.
Manipulating DOM Using Javascript Methods
With Javascript, you can manipulate DOM properties these methods trigger the DOM manipulation. Here are some common methods used in manipulating DOM in Javascript.
1. getElementById()
In HTML, Id are unique identifiers, these unique identifiers cannot be redeclared with the same Id name. Certainly, it means that these names cannot have the same id for different elements.
This can't work out because you gave the id the same:
<li id="content">He's just a DOM😂</li>
<li id="content">She's just a DOM😂</li>
This works out because you gave the id separate names:
<li id="contentOne">He's just a DOM😂</li>
<li id="contentTwo">She's just a DOM😂</li>
Now for the getElementById(), let's take a quick example of how the method works:
<html lang="en">

<head>
    <meta charset="UTF-8">
    <meta name="viewport" content="width=device-width, initial-scale=1.0">
    <title>Document</title>
</head>

<body>
    <h1 id="heading">Emma is coding</h1>

    <script>
        const heading = document.getElementById("heading")
        console.log("Heading", heading)
    </script>
</body>

</html>
The console.log("Heading", heading) logs this in the browser console.

2. getElementByClassName()
In HTML, getElementByClassName() is used for getting the class name of an element in the DOM tree node. These methods work in handy with the class naming collection in HTML.
Now for the getElementByClassName(), let's take a quick example of how the method works:
<html lang="en">

<head>
    <meta charset="UTF-8">
    <meta name="viewport" content="width=device-width, initial-scale=1.0">
    <title>Document</title>
</head>

<body>
     <ul>
        <li class="content">He's just a DOM😂</li>
        <li class="content">He's just a DOM😂</li>
        <li class="content">He's just a DOM😂</li>
    </ul>

    <script>
        const content = document.getElementsByClassName("content");
        console.log("Content", content)
    </script>
</body>

</html>
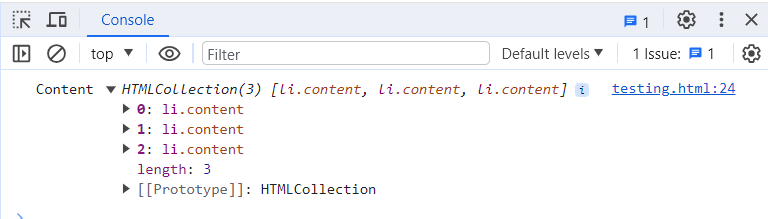
The console.log("Content", content) logs this in the browser console. If you look closely at the length property in the console, you will find out that it has 3 length sizes printed out, and in your code, you have 3 list tags of elements on it.
3. getElementByTagName()
In HTML, getElementByTagName() is used for getting a segmented array of tag names of an element in the DOM tree node.
<html lang="en">

<head>
    <meta charset="UTF-8">
    meta name="viewport" content="width=device-width, initial-scale=1.0">
    <title>Document</title>
</head>

<body>

    <ul>
        <a>Hi</a>
        <a>Hi</a>
        <a>Hi</a>
    </ul>

    <script>
        const content = document.getElementsByTagName("a");
        console.log("Content", content)
    </script>
</body>

</html>
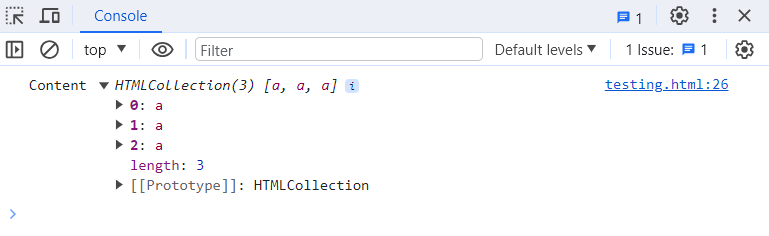
The console.log("Content", content) logs this in the browser console. It shows an array of tag names which is the <a> tag used in the code above.
4. querySelector()
In HTML, querySelector() returns the first element that matches the specified CSS selector(s) in the document.
<html lang="en">

<head>
    <meta charset="UTF-8">
    meta name="viewport" content="width=device-width, initial-scale=1.0">
    <title>Document</title>
</head>

<body>
    <h1 id="heading">Emma is coding</h1>

    <ul class="content">
        <li>He's just a DOM😂</li>
        <li>He's just a DOM😂</li>
        <li>He's just a DOM😂</li>
    </ul>

    <script>
      const selectorH1 = document.querySelector("h1");
        console.log("SelectorHeading", selectorH1)

        const content = document.querySelector(".content");
        console.log("SelectorContent", content)
    </script>
</body>

</html>
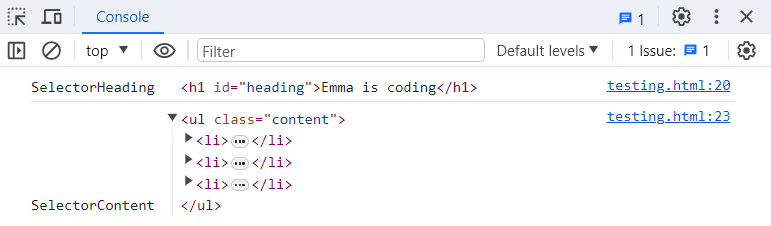
The console.log("SelectorHeading", selectorH1) logs the <h1> elements with its text - "Emma is coding". And the console.log("SelectorContent", content) logs the <ul> listing tag together with the <li> sub tag in it.
5. querySelectorAll()
In HTML, querySelectorAll() returns all elements that match the specified CSS selector(s) in the document.
<html lang="en">

<head>
    <meta charset="UTF-8">
    meta name="viewport" content="width=device-width, initial-scale=1.0">
    <title>Document</title>
</head>

<body>
    <h1>Emma is coding</h1>
    <h1>Emma is coding</h1>
    <h1>Emma is coding</h1>

    <script>
      const selectorH1 = document.querySelectorAll("h1");
        console.log("SelectorHeading", selectorH1)
    </script>
</body>

</html>
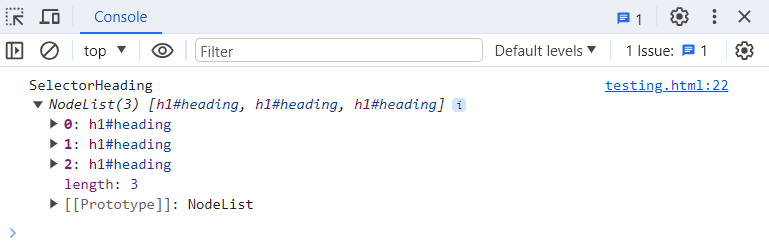
The console.log("SelectorHeading", selectorH1) logs all the <h1> elements. That's generally the work of querySelectorAll(), it returns all elements that match specified CSS selector(s) in the document. While querySelector() returns the first element that matches the specified CSS selector(s) in the document.
6. createElement() and appendChild()
createElement():
This method creates a new element in a DOM tree.
 let unorderlist = document.createElement("ul");
 console.log(unorderedlist)
Now the console.log(unorderedlist) creates a new <ul> tag let move further you will learn how to make this <ul> tag get a <li> tag that will print a list item in the browser.
appendChild():
appendChild() is used for adding a new child node to the end list of the parent node. This works in handy with the createElement() which I will give a practical example of how it works together with the createElement().
Now let's take the example we used for the createElement(), in this example, we'll create an unordered list of programming languages and watch how this will print on our browser.
Now take the example you used in the createElement(), this time you are adding a document.body.appendChild() which will make the list items display on the browser.
 let unorderedList = document.createElement("ul");
  console.log(unorderedList)
  document.body.appendChild(unorderedList);
Now let's create the list items of programming languages we want to use, all this will be declared in a variable.
let listItem1 = document.createElement("li");
let listItem2 = document.createElement("li");
listItem1.textContent = "Python";
listItem2.textContent = "Java";
Now call the unorderList which is the parent node to append all these list items into it.
unorderedList.appendChild(listItem1);
unorderedList.appendChild(listItem2);
Let's add a little styling to the list.
listItem1.style.color = "red";
listItem2.style.color = "blue"
Now let's join all the code together.
<html lang="en">

<head>
    <meta charset="UTF-8">
    <meta name="viewport" content="width=device-width, initial-scale=1.0">
    <title>Document</title>
</head>

<h1>Emma is Coding</h1>

<body>

    <script>
        let unorderedList = document.createElement("ul");
        console.log(unorderedList)
        document.body.appendChild(unorderedList);
        let listItem1 = document.createElement("li");
        let listItem2 = document.createElement("li");
        listItem1.textContent = "Python";
        listItem2.textContent = "Java";

        listItem1.style.color = "red";
        listItem2.style.color = "blue";

         unorderedList.appendChild(listItem1);
         unorderedList.appendChild(listItem2);

    </script>
</body>

</html>
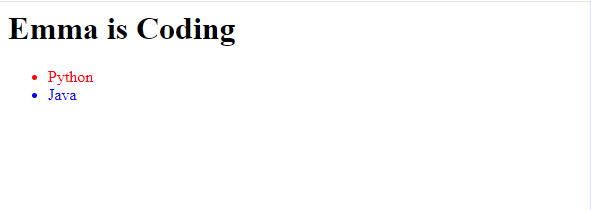
Now check your browser to see this displayed as a list of programming languages.
Conclusion
Now we have come to a wrap of this article, Remember DOM is a great programming interface used for creating and removing elements from a website document. There are many other javascript methods for manipulating DOM, you can do further research on them on MDN DOCS. Thanks💥 for reading through i would like to know other DOM methods you use in the comment section.
Follow my Twitter page for more algocodeman
Follow me on GitHub EmmaUmeh


